
This post contains affiliate links. When you purchase through links on our site, we may earn an affiliate commission. Read our disclosure.
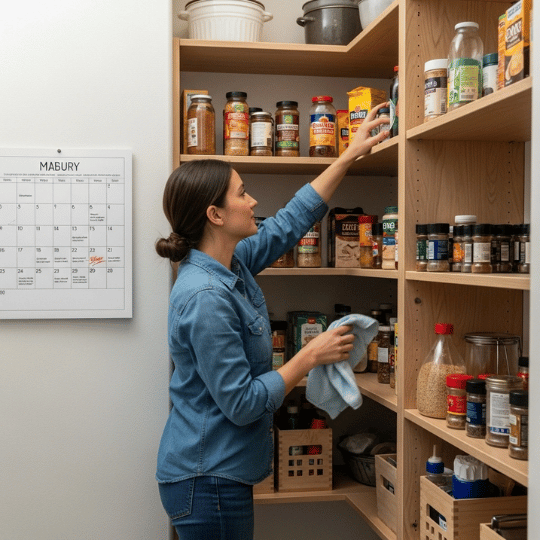
Tired of digging through your pantry looking for snacks? Can’t find what you need when cooking dinner? A well-organized pantry saves time, money, and stress.
When your pantry is messy, you can’t see what you have. This leads to buying duplicate items and forgetting about food until it expires. The average family wastes $1,500 worth of food each year due to poor pantry organization.
Organizing your deep pantry is easier than you think. Let’s break it down into simple steps.
Why Deep Pantries Get So Messy
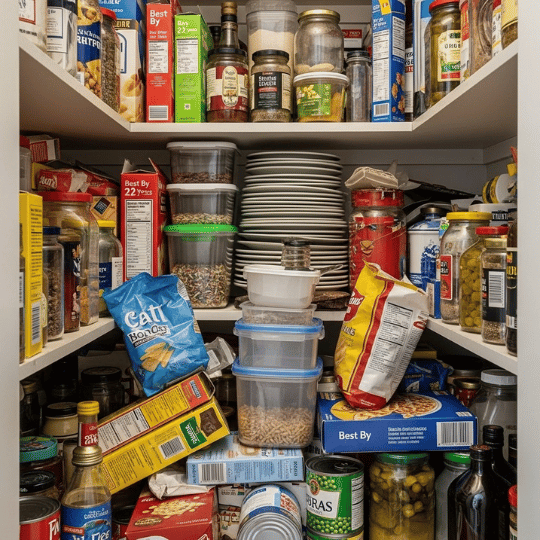
Deep pantries are harder to organize than shallow ones because:
- Items get pushed to the back and forgotten
- You can’t see everything at once
- Heavy items are hard to move around
- Without proper systems, things pile up quickly
But deep pantries also have advantages – they hold more stuff and can be super efficient with the right setup.
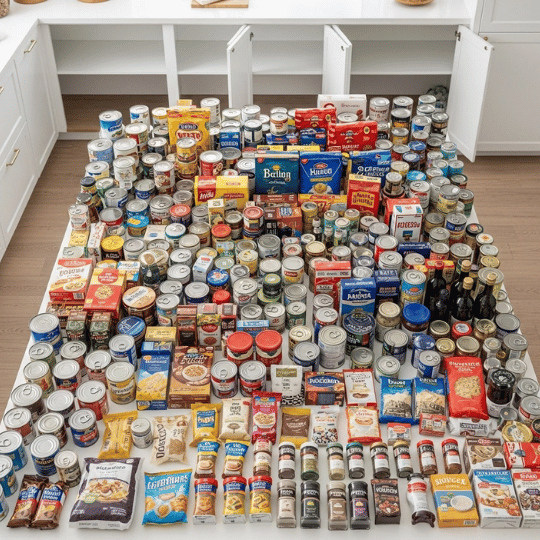
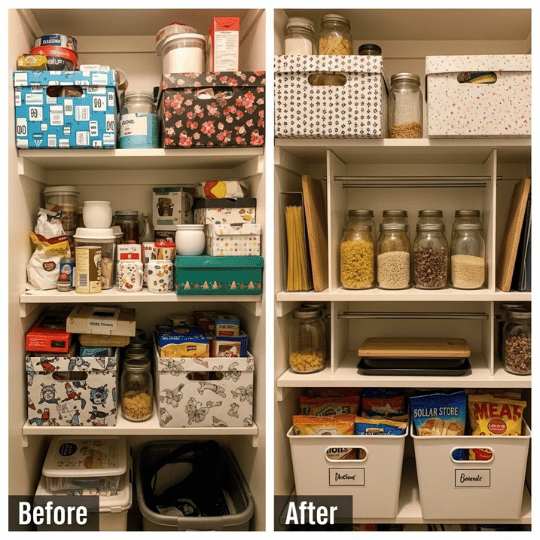
Step 1: Start with a Complete Pantry Cleanout
Empty Everything Out
Take every single item out of your pantry. Yes, everything! Put it all on your kitchen counter or dining table.
Check Expiration Dates
Throw away anything that’s:
- Past its expiration date
- Smells bad or looks weird
- Been open too long (check storage guidelines)
- Infested with bugs
Pro tip: Most people find 20-30% of their pantry items are expired during the first cleanout.
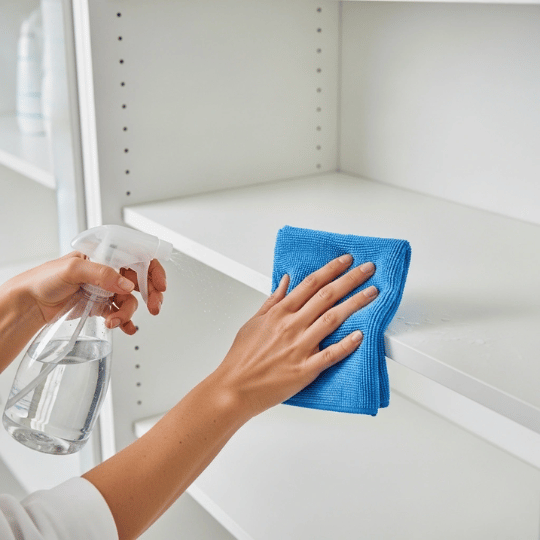
Deep Clean Your Shelves
- Wipe down all surfaces with warm soapy water
- Remove sticky spots and crumbs
- Let everything dry completely before putting items back
Time needed: Plan 2-4 hours for a complete deep pantry cleanout.
6 Simple Steps to Organize Your Deep Pantry Like a Pro
1. Group Similar Items Together (The Foundation of Good Organization)
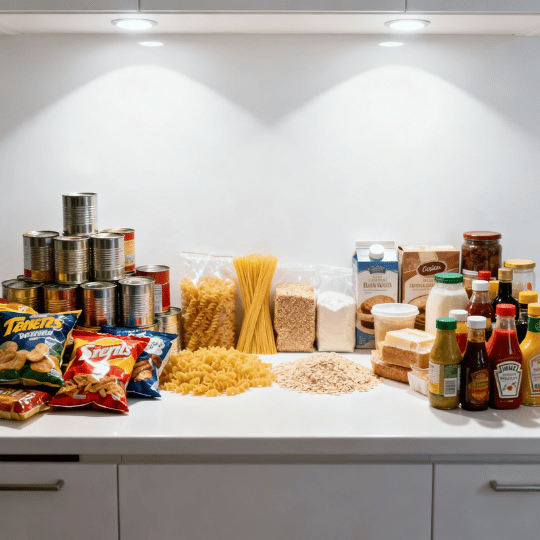
Before putting anything back, sort everything into categories:
Food Categories:
- Canned goods (vegetables, soups, sauces)
- Grains and pasta
- Baking supplies (flour, sugar, baking powder)
- Snacks and treats
- Breakfast items (cereal, oatmeal, coffee)
- Condiments and sauces
- Spices and seasonings
Why this works: Grouping shows you exactly what you have. You might discover you have 5 boxes of pasta or 3 bottles of vanilla extract!
2. Measure Your Space Before Buying Storage Solutions
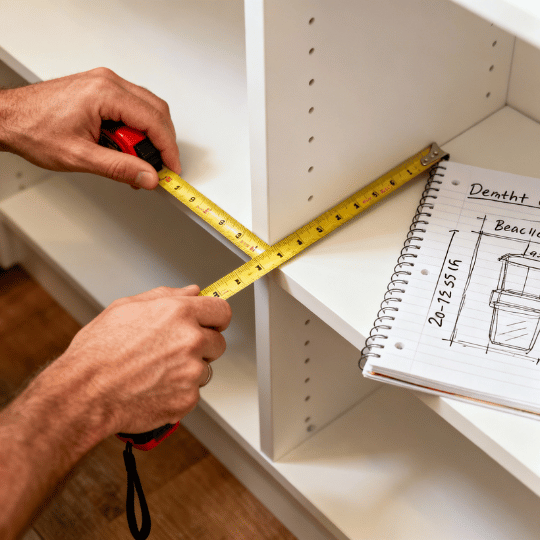
Essential measurements to take:
- Shelf width, depth, and height
- Distance between shelves
- Door clearance space
Sketch a simple layout showing where each category will go. This prevents buying storage containers that don’t fit.
Average deep pantry dimensions: Most deep pantries are 24 inches deep, compared to 12 inches for standard shelves.
3. Choose the Right Storage Solutions for Deep Pantries
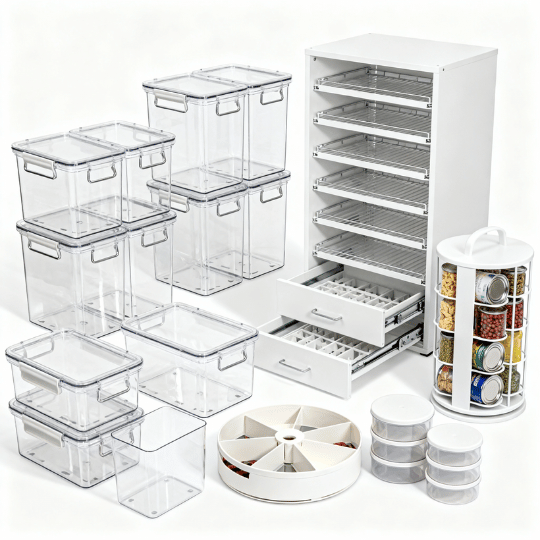
Clear Storage Containers with Handles
- Best for: Snacks, baking supplies, small packets
- Why they work: You can see what’s inside and pull them out easily
- Cost: $3-15 each, depending on size
Pull-Out Drawers and Baskets
- Best for: Heavy items, canned goods, root vegetables
- Why they work: Bring items from the back to the front effortlessly
- Cost: $25-75 per drawer (DIY options available for $10-20)
Tiered Can Organizers
- Best for: All types of canned goods
- Why they work: You can see every can label at once
- Cost: $15-30 for most pantries
Lazy Susans (Turntables)
- Best for: Oils, vinegars, sauces, condiments
- Why they work: Perfect for deep corners and back areas
- Cost: $10-25
Stackable Bins
- Best for: Root vegetables, bulk items, seasonal items
- Why they work: Maximize vertical space efficiently
- Cost: $5-20 each
Over-the-Door Organizers
- Best for: Spices, small packets, wraps, foil
- Why they work: Uses wasted door space
- Cost: $15-40
4. Create a Smart Labeling System
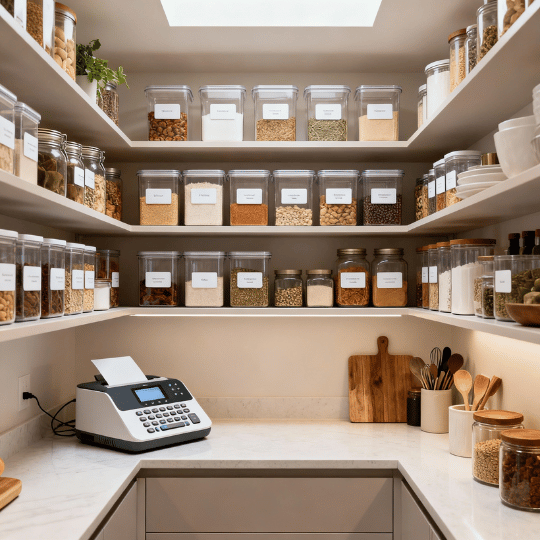
Label everything clearly:
- Storage bins and containers
- Shelf sections
- Expiration date reminders
Labeling ideas:
- Use a label maker for a professional look ($15-30)
- Write on masking tape with a permanent marker (budget option)
- Use chalkboard labels for items that change often
Include these details on labels:
- What’s inside
- Expiration dates for bulk items
- “Use first” for older items
5. Follow the “Use It Most, Store It Best” Rule
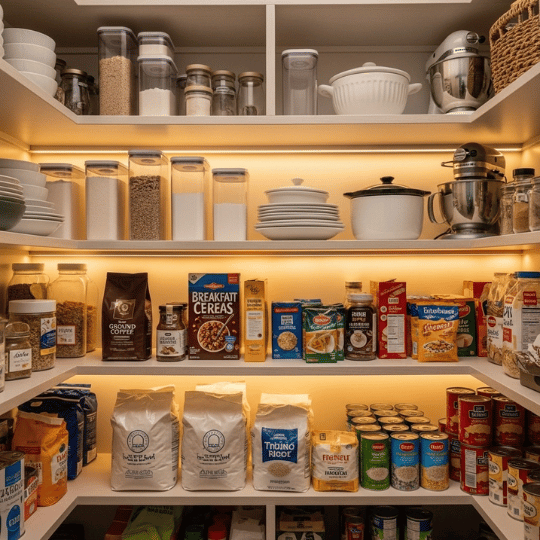
Eye-level shelves (most accessible):
- Daily breakfast items
- Snacks
- Coffee and tea
- Cooking oils you use often
Lower shelves:
- Heavy items (flour, sugar, bulk items)
- Kids’ snacks and lunch supplies
- Appliances you use weekly
Upper shelves:
- Holiday baking supplies
- Bulk paper goods
- Items you rarely use
Deep back areas:
- Backup supplies
- Seasonal items
- Extra condiments
6. Set Up a Monthly Maintenance Routine
Monthly pantry check (15 minutes):
- Remove expired items
- Wipe down shelves
- Put items back in their proper places
- Make a grocery list of what you need
Quarterly deep clean (1 hour):
- Take everything out
- Deep clean shelves
- Reorganize as needed
- Update labels
Budget-Friendly Deep Pantry Organization Ideas
DIY Storage Solutions Under $50:
- Use shoe boxes covered in contact paper ($5-10)
- Repurpose glass jars for small items (free)
- Make simple pull-out trays with wood and drawer slides ($15-25)
- Use tension rods to create dividers ($3-8)
Dollar Store Finds:
- Clear plastic bins
- Drawer organizer trays
- Small baskets
- Shelf liner
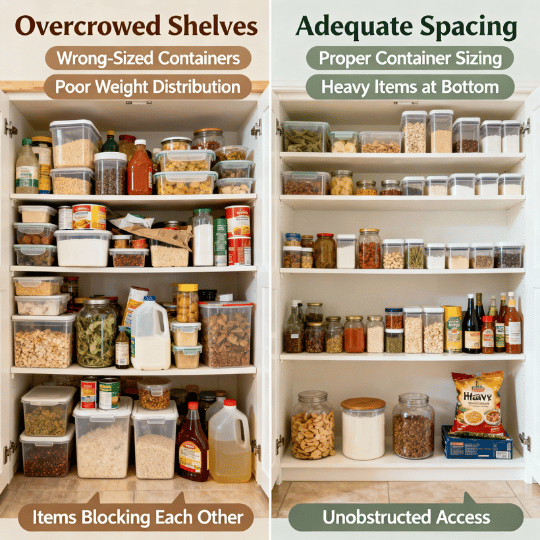
Common Deep Pantry Organization Mistakes to Avoid
- Buying storage before measuring – Always measure first
- Not leaving space for new items – Keep 20% of space free
- Storing everything in the original packaging – Transfer to clear containers when possible
- Ignoring weight limits – Don’t overload shelves
- Forgetting about air circulation – Leave space around items
Deep Pantry Organization FAQ
How do I keep food from getting lost in the back?
Use pull-out drawers, clear bins with handles, and lazy susans. Store frequently used items in front and keep similar items grouped together.
What’s the best way to store canned goods in a deep pantry?
Tiered can organizers work best. They let you see all labels at once and access cans easily. Store newer cans in back, older ones in front.
How often should I organize my pantry?
Do a quick 15-minute tidy-up monthly. Schedule a deeper organization session every 3-4 months or when things start getting messy again.
Can I organize my deep pantry on a tight budget?
Absolutely! Start by decluttering (free), then use items you already have, like boxes and jars. Focus on grouping and labeling before buying anything new.
What if my deep pantry is also narrow?
Maximize vertical space with stackable containers. Use the door for extra storage. Consider a rolling cart that fits the width – you can pull it out when needed.
How do I organize a deep pantry with kids?
Put kids’ items on lower shelves in easy-to-reach containers. Use pictures on labels for non-readers. Keep healthy snacks at kid height and treats up higher.
Your Next Steps to Pantry Success
Week 1: Empty and clean your pantry, group items
Week 2: Measure space and buy storage solutions
Week 3: Set up your new organization system
Week 4: Fine-tune and create your maintenance routine
Remember: You don’t have to organize everything at once. Start with one shelf or category and build from there.
A well-organized deep pantry will save you time, money, and stress every single day. The average person saves 30 minutes per week with a properly organized pantry—that’s 26 hours per year!
Ready to transform your pantry? Pick one small area and start today. Your future self (and your wallet) will thank you.
This post contains affiliate links. When you purchase through links on our site, we may earn an affiliate commission. Read our disclosure.